Spam filtering
Spam filtering is not enabled by default. Before you enable the spam filter, consider the information about privacy below.
Enabling the spam filter
In webmail, go to Settings -> Filters. The middle pane contains a list of filter. At the very top, you can select a filter set (make sure it is enabled). To add a forwarding filter, click Create in the right pane.
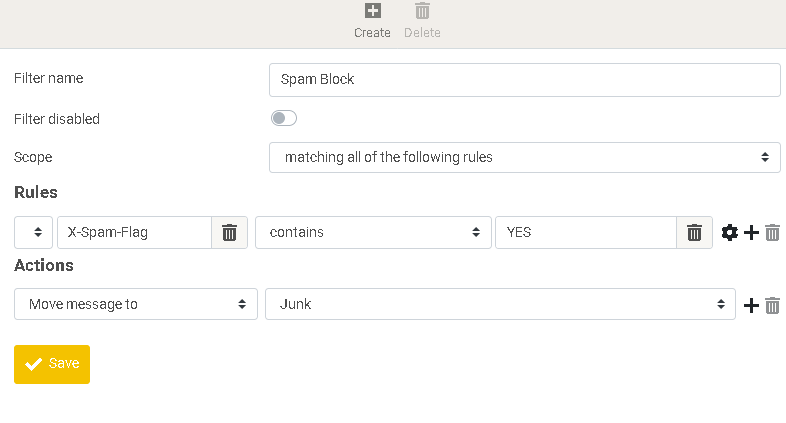
Fill out the form as illustrated in the image below.
- In the field Filter name, enter "Spam Block" or another suitable name.
- Under Rules, in the first drop down box, select .... In the field following it, enter "X-Spam-Flag". In the second drop down box, select contains not. In the field following it, enter "YES".
- Under Actions, select Move messages to in the first drop down box. In the second drop down box, select the folder "Junk".
- Optional: under Actions, click +. In the first drop down box, select Stop evaluating rule.
- Click Save.
Please keep your Inbox tidy – move all spam to the Junk folder – so that the spam filter is learning appropriately what is spam and what is not.
Privacy policy
The spam filtering software needs to read the emails in your Inbox and Spam folders to learn what is spam and what is not. Even after you've deleted these emails, the spam filter might still have a copy of them in its storage which cannot be deleted. Users of DLNET Cloud consent to this practice unless they explicitly opt out of spam filtering. Please send me a message if you wish to opt out.
